Make a Booking - Sequence (See first, then the text below)
See also ... How To's - Frequently asked questions
See also Multi Book Support
There are several ways to make a new booking.
♣From the Command Centre, select the Bookings Button
♣From the Booking Ledger; double click on a vacant square in the Grid
♣From the Map; double click on a vacant site indicator
♣From the Waiting List (Lists)
♣From the Command Centre Menu
♣From the Search Options window
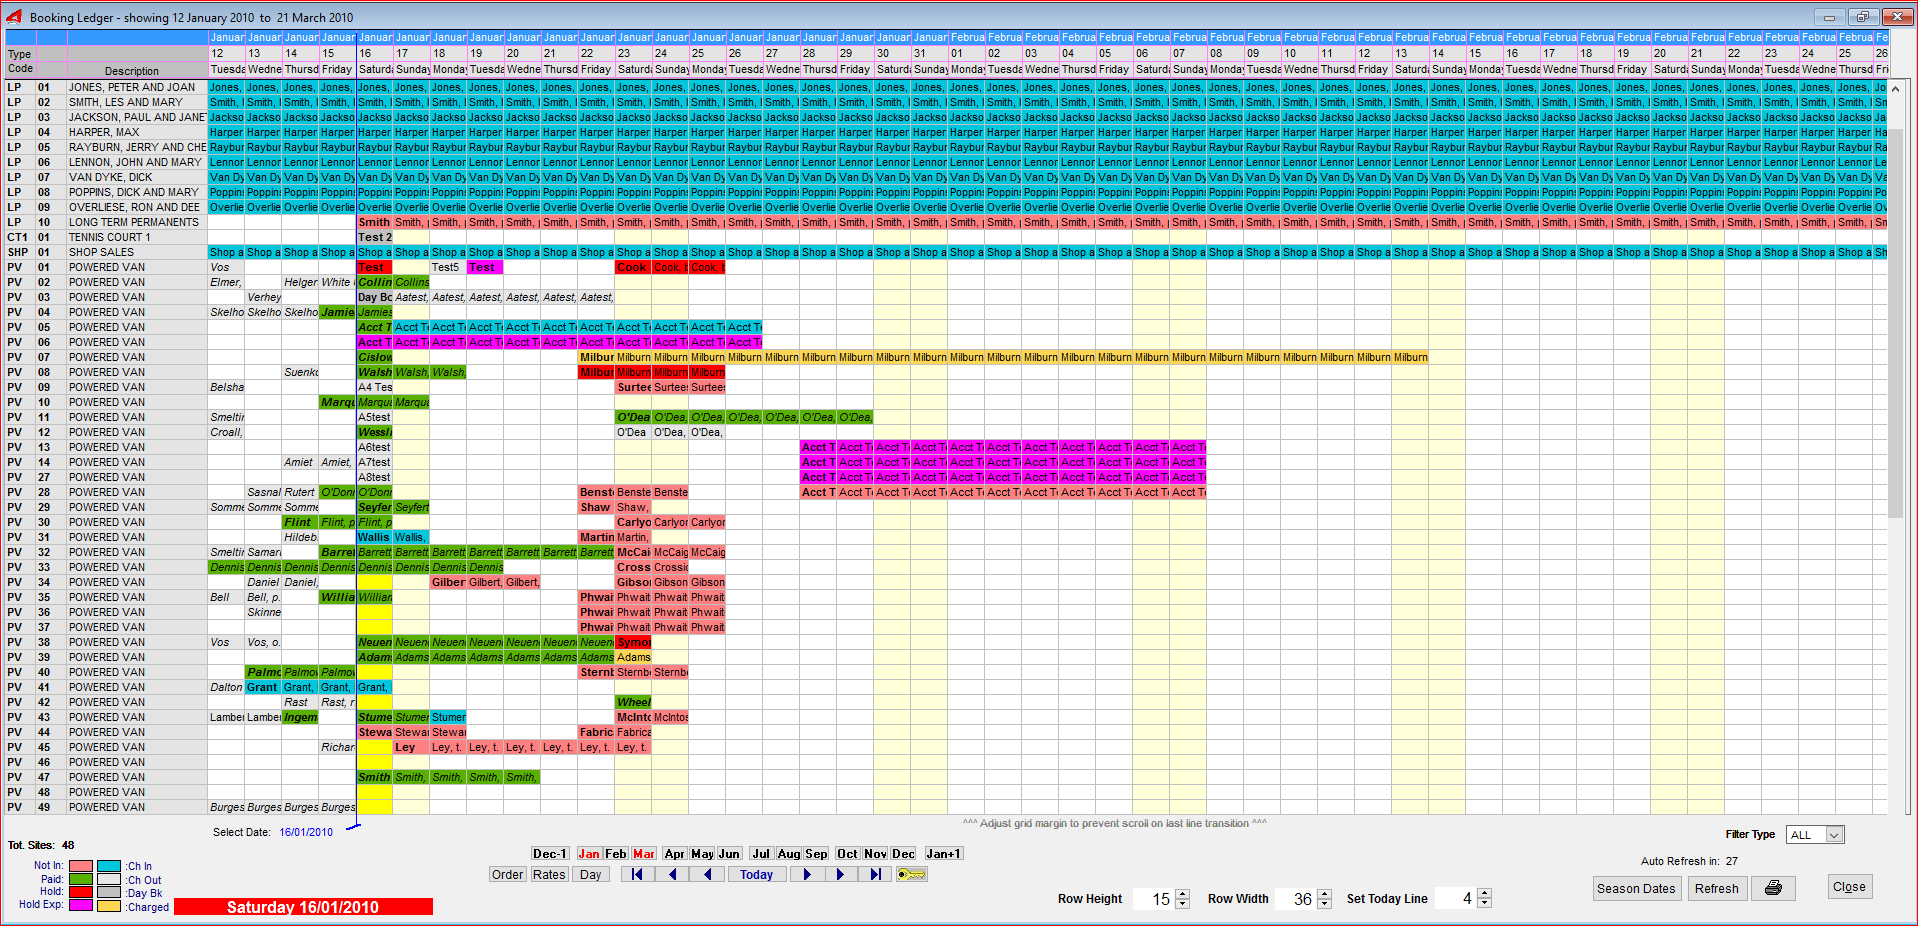
From the Booking Ledger; double click on a vacant square in the Grid - The ledger is adjustable, so you can display more sites and/or more weeks in advance. Right click to access a drop down menu or double right click to make a booking or group booking.
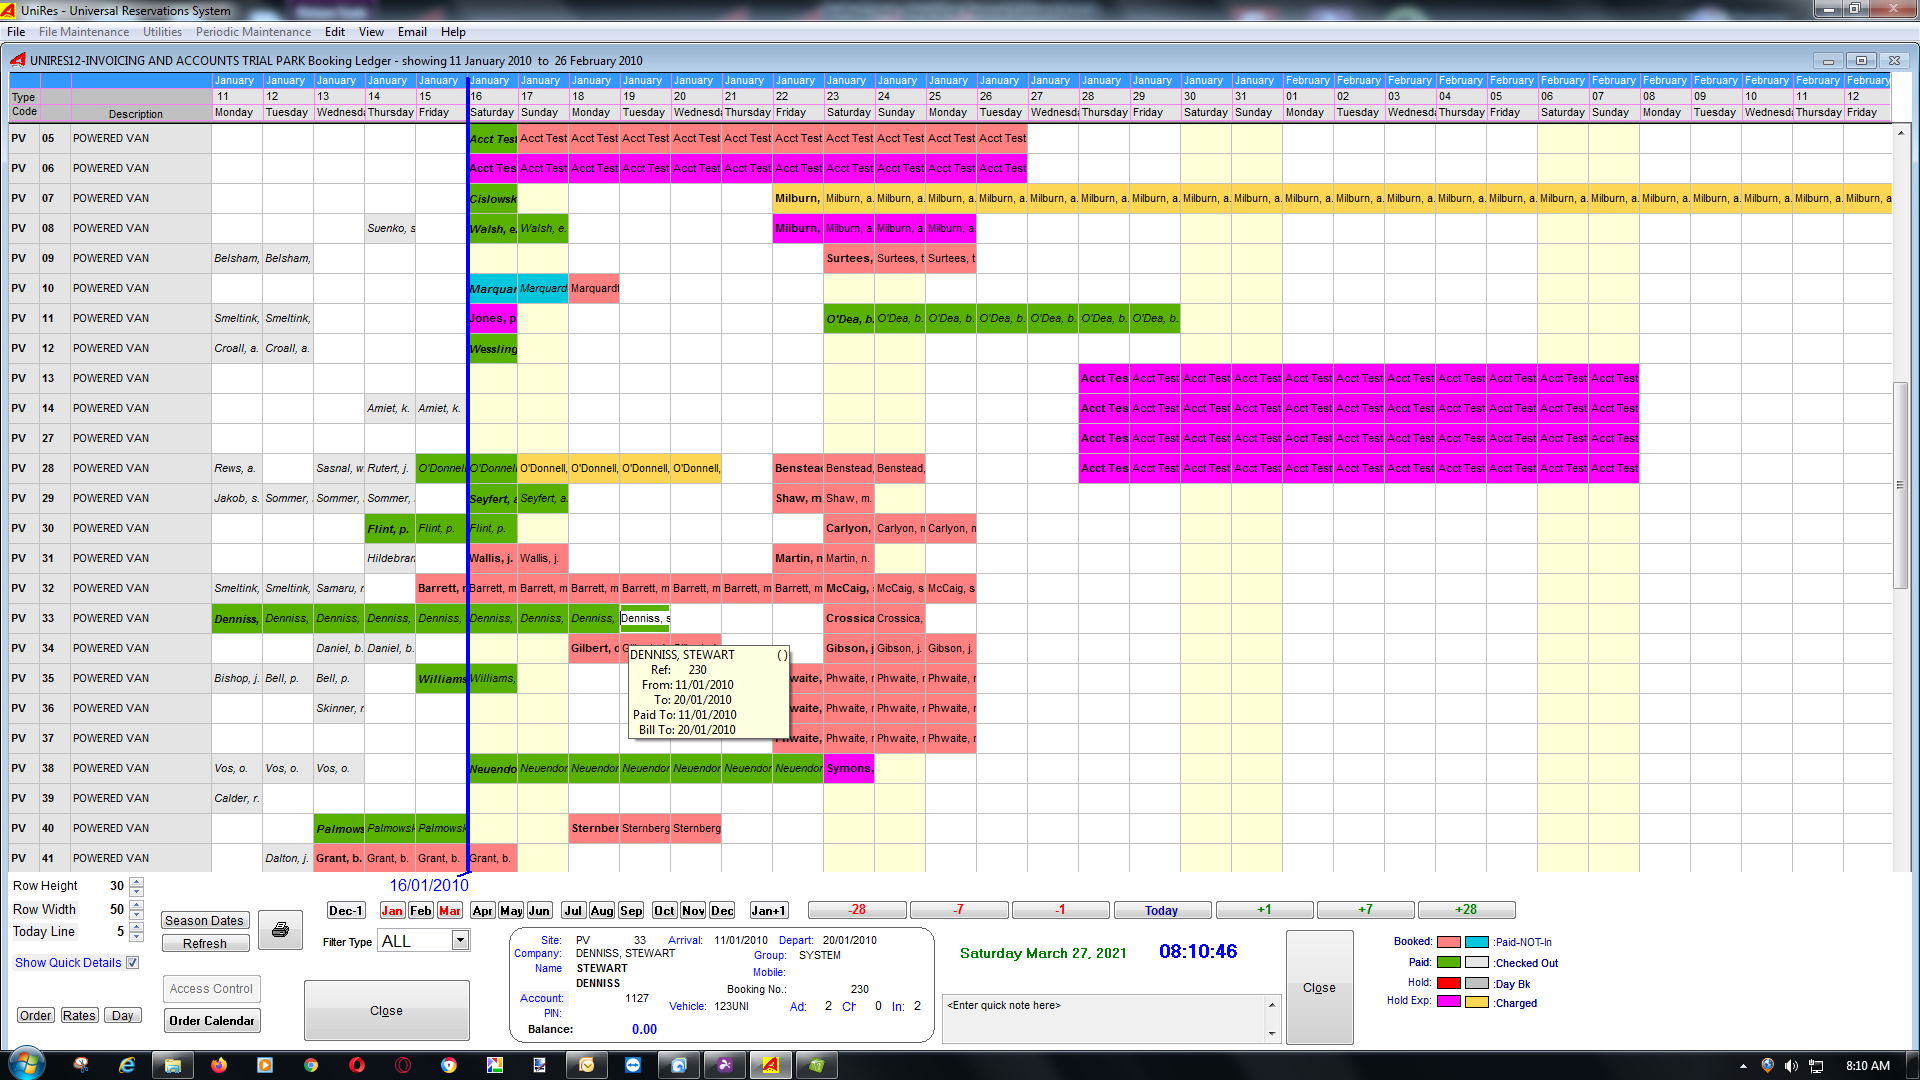
Same ledger but showing more sites and dates ...

The "Set Today Line" adjustment the yesterday/today and tomorrow line to be adhusted, showing more or less past bookings.
Day Bookings are show in Grey (not the checked out bookings), in the normal booking ledger and when clicked, the Day Booking Ledger is brought forward.
OR
From the Map; double click on a vacant site indicator
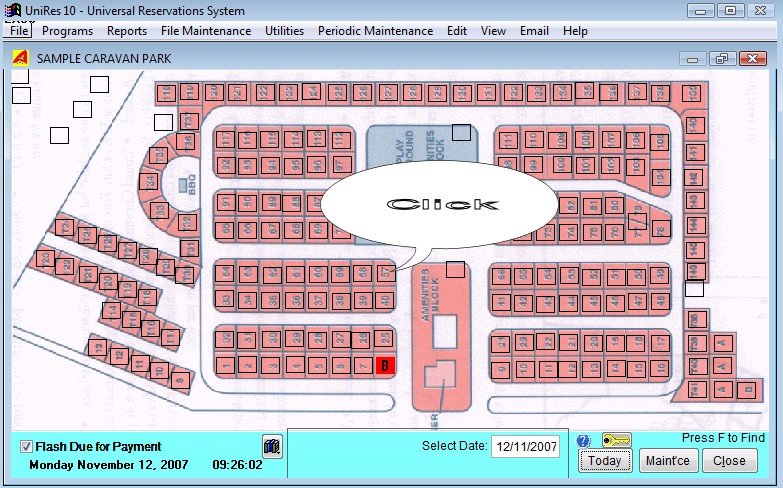
When the Booking window opens, start by entering a Surname and step through the fields, entering data as required.
Booking Details are entered for a basic booking. After the booking has been made (you have travelled past the Key Number field or clicked on the Book button), you will be given the option to save the booking and then asked if you want to enter Charges.
Making a booking directly from the ledger
Select a Booking and go to charges
Display occupancy for selected site types
Skip forwards and backwards in time
Confirmed and unconfirmed bookings
Start the Booking Ledger program from the Command Centre - Daily Functions and click on the Booking Ledger Button on the Command Centre.
The Booking Ledger window will appear.
The following functions are provided by the Booking ledger …
Dynamic Multi-User updating window.
When other terminals are entering or changing bookings , the screen automatically refreshes and updates the display. The refresh time is adjustable in system settings.
Booking Ledger Controls
See: Skip forward and backward in time
Booking Ledger Colours Legend
Not In: This colour denotes a booking which has not checked in or out. A plain booking.
Paid: This colour shows the paid-up period (paid-to-date) of a booking.
Hold: The booking has no payments to account yet and the hold date time has not expired.
Hold Exp: Hold Expired - No payments received yet to the booking and the Hold Date Time has lapsed.
Ch In: Indicates a booking has a checked-in status. Note: The System Settings - Booking TAB has a setting that can change the displayed data format colouring to indicate Paid-NOT-In or Checked in.
Ch Out: The booking has a checked out status or a Cancelled Status. The period can be rebooked.
Day Bk: The bookings from and to dates are the same, indicating that the booking is a day booking. Click on the booking to view the day ledger.
Dark Grey: (Not shown on legend) - The booking is in a drag and drop (cut & paste) state and the operation is in progress.
Order Button
See: Booking Ledger Controls illustration above.
You can set the display order by click ing on the Order button.
Click on the thumbnail button to the left of the site number, hold down the left mouse button and drag the number to the position you want it to appear in the booking ledger display, then let go of the mouse button.
Repeat for each one you want to move. Nudge the site when at the top of the list to move it past the window area.
Reset Order to ... If you reset the order, the standard display order will replace the changes. Be carefull, otherwise you will undo all your work to set the order.
The Key button
Only visible if you have the boom gate module installed as an option. This button shows and hides the boom gate tool bar.
Vis
•Make a booking directly from the ledger
•Select a booking and go to charges
•Display occupancy for selected site types
•Instant brief booking detail shown near mouse pointer.
•Skip forward and backwards in time
•See Seasonal Rate Periods on the top calendar line (shaded light red)
•Seasonal Rates can be shown in different colours for the different seasonal periods
•Print or Preview the Booking Ledger as displayed.
•Paid To Date - unpaid days shown in red, paid-up days shown in Green
•Bookings being Held (unconfirmed bookings) shown in orange
•Lapsed unconfirmed bookings shown in violet
•Access the Rates File directly
Visualize your Park Occupancy
The booking ledger grid displays booked sites as well as vacant days.
The start of a booking is shown as a capital B and the follow-on days are in a lower case b and shaded green, Red, Orange or Violet.
Note that the last day of the booking is shown, not the departure day/date.
The Blue line running down the ledger is today's date which is on the Marker Date.
The white squares (and the light yellow squares) are vacant days for the site.
The weekend days are shown in light yellow.
The Marker Date
The Blue Marker Date Line (a Vertical Line) is always shown on your booking ledger grid. Normally one week from the left boarder date, but this is adjustable from 0 days to 14 days. The Booking Ledger shows 1 week before the marker date ( to get a perspective of past bookings) and 4 weeks in advance. A total of 6 weeks is visible at any one time. Move ahead or back oneday, one week, one month or 12 months at a time.
The Marker date is shown as a vertical Blue solid line and is always immediately left of the Marker Date.
The Marker Date is set to today's date when the booking ledger program is started. You can set the marker date to any date you want by entering a date in the marker Date field. The booking ledger is positioned to the marker date.
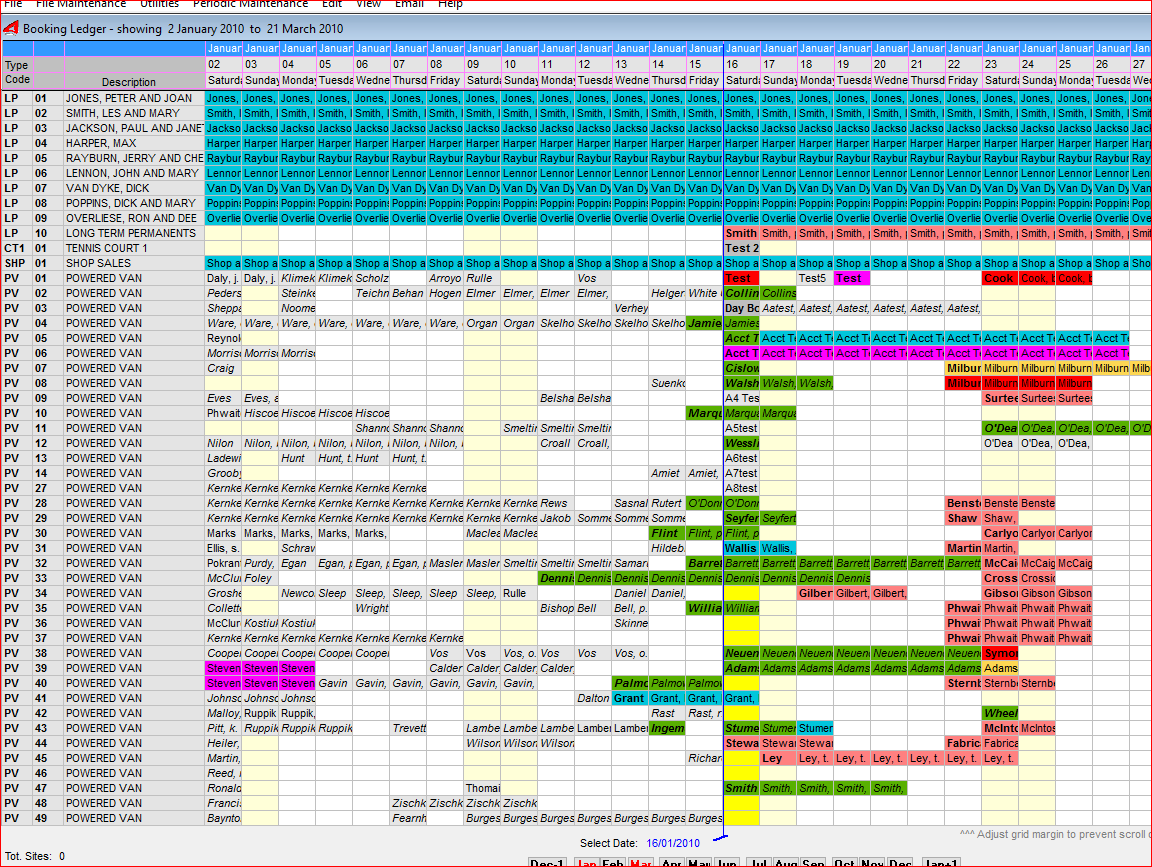
Today's Date Marker
If the Booking Ledger dates encompass today's date, you will see a bright yellow vertical line on the grid. This is the Today's date marker line. Note that the line may not be visible if all the sites are booked.
Instant brief booking detail shown near mouse pointer.
As you move the mouse pointer around the booking ledger grid, you will see a white square move around in front of the pointer. If you pause for a second, as you stop on a booking line, the occupants Surname, First name, From, To and paid to info is displayed.
Tip: If the booking ledger Grid is not showing the booking details, click anywhere on a vacant site block to activate the grid.
Site Rates
Print or Preview the Booking Ledger as displayed.
You can print and/or print preview the booking ledger for the selected 5 week period.
The printed report is similar in structure as the screen display. No colours are printed however.
To print the currently displayed ledger click on the print button.
If you want to see what the report looks like before printing, click on the preview tick box first, then click on the print button.
The customise button will launch the report designer which allows you to modify a report. This is an advanced user function and should not be attempted by novice computer users. Call support if you want a report changed.
Site Type and Number Column
Just the Site Type and Number followed by the Description of the Sites and the booking calendar grid.
Description Column
The description comes from the Site Types file if there is no alternate description for the individual site as set in Site Numbering Maintenance.
Filtering List by Site Type
To the lower right of the booking ledger you will see a list box which allows select of site types.
Place you cursor in this box of click on the dropdown arrow on the field to see the site types defined for your park. Select a site type. The display window will then filter out al sites except the site type you selected. Select All to see all sites.
The last Filtered site type is remembered by UniRes, so that the next time you start the booking ledger the previously selected site types only are show.
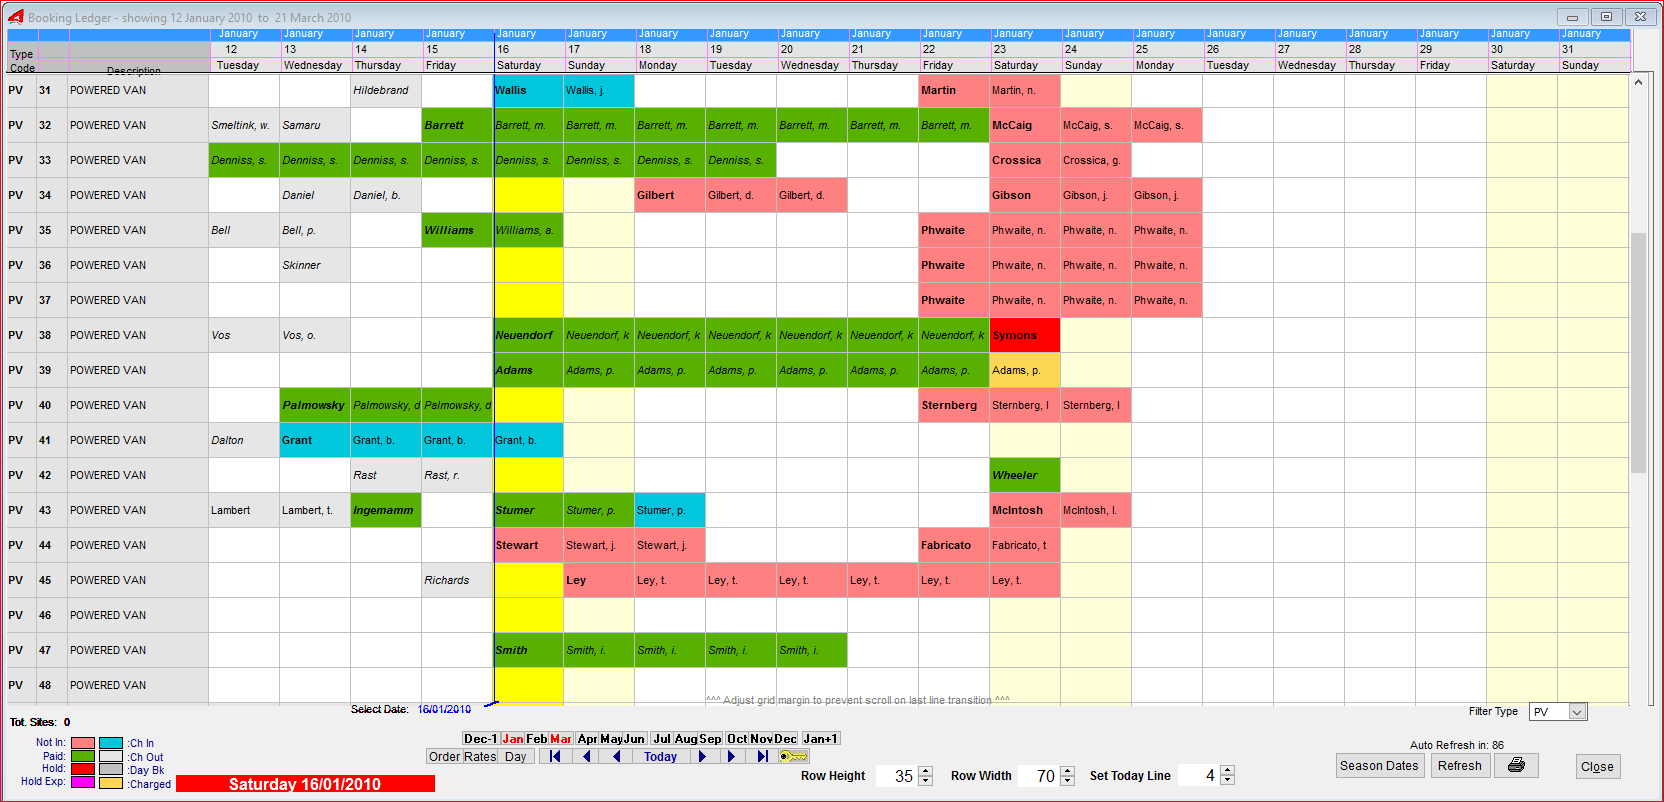
Adjust the ledger display to suit using the three ption setting at the lower screen.
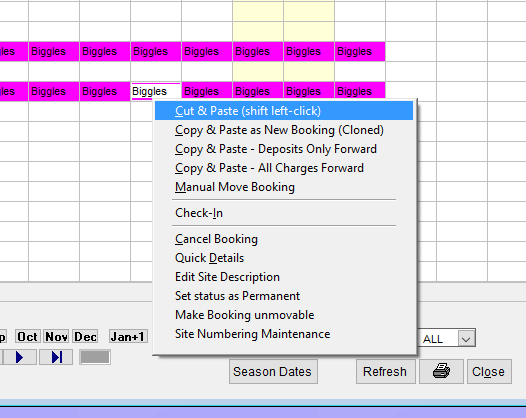
You can ....
Make a booking from the grid.
Bill an account.
Check in or out a client.
Move Types ...
1.Copy and Paste (Click Drag-n-drop) a booking to another site.
2.Copy and Paste as New Booking (Cloned) - Leaves original in place.
3.Copy and Paste - All charges forward. - Leaves original booking and create a new one bring forward the booking details and transactions. (Handy for contact worker account billing)
4.Manual Move - Extend/Shorten Bookings.
5.Cancel a booking
6.Quick Details screen (access to history booking)
7.Edit Site Description in left column.
8.Set Status of booking as Permanent
9.Make Booking unmovable
10.Immediate Access to Site Numbering Maintenance.
Smart Grid colouring shows ...
1.Arrived or Not Light Red.Blue)
2.Paid-to Date (Green)
3.Billed-To Date (Yellow)
4.Hold status (hold/expired hold time (individual booking definable in quick popup) - Red/Purple
Day Bookings can also be made (24 hr Grid)
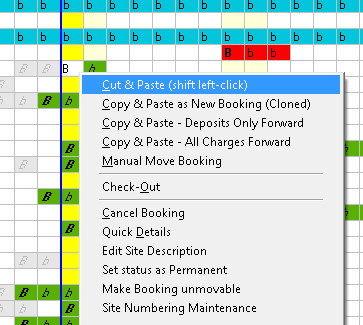
Copy and Paste & Forward Booking Capability
Cut and Paste has been around for a while, where you can right-click on a booking in the booking Ledger and paste it to the same or another site.
Three new options ..
1.Copy & Paste as New Booking (Cloned)
2.Copy and Paste - Deposits Only Forward
3.Copy & Paste - All charges Forward
are available now.
Copy & Paste as New Booking (Cloned) : Makes a Copy of the Booking and then duplicates it to where ever you paste it. No transactions or Balances, or Deposits are copied over to the new booking. A new booking number is generated for the new booking.
Copy and Paste - Deposits Only Forward: This is the same as 1. above, except that deposits are moved to the new booking. This is handy if your client wishes you to retain their deposit for "next year" . The deposit is reversed from the booking being copied and placed in the appropriate deposit field in the new booking.
Copy & Paste - All charges Forward: This is the same as in 2. above,
Clone Booking Window
When "Pasting" a Copied booking, the following screen will be shown....
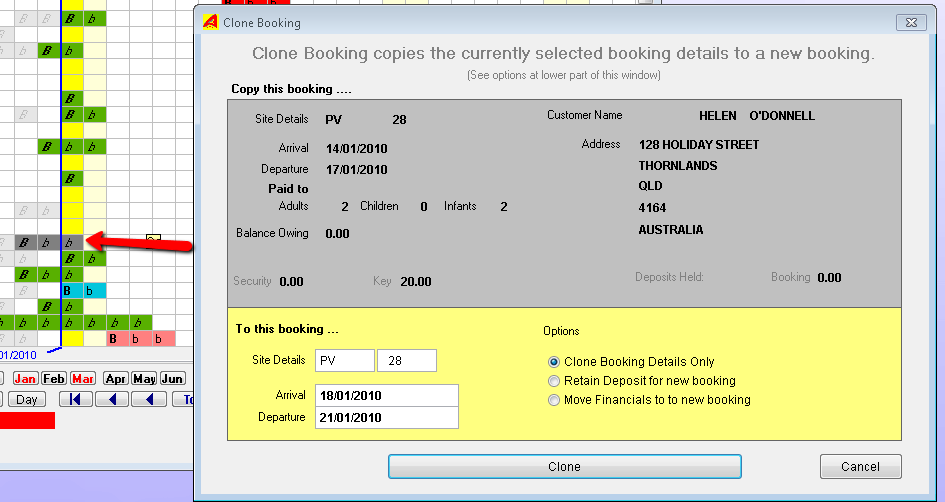
In the above example, the Grey area shows the Source booking and the Yellow aresa shows the destination.
Note that you can also ..
Change the Site Type and Number
Change the Arrival and Departure dates
or Change the Cloning type from the initially one selected.
Click on the Clone button to action the job.
Click on the Cancel button to cancel the action.
Tip: If you are cloning a Christmas booking from one year to another with deposits to be brought forward..
1.Refund the keys (if any) while in the Book & Bill Charges screen.
2.Leave deposits on file.
3.Do not check the booking out yet.
4.Return to the Booking Ledger. Find the current booking
5.Right Click on the booking, select the copy and paster option 1 or 2.
6.Right Click on a free day anywhere to the right of the booking (same site or another)
7.Right Click and select Paste.
8.Set the Arrival and Departure Dates for Next Years Booking. (see above example window)
9.Click on the Clone Button.
10.Return to the Today's date in the Booking Ledger
11.Select the old booking.
12.Right Click - then select Check-out.
You can use the Clone Option 1 (Just Copy and Paste also to make and Easter Booking the same way.
Created with the Personal Edition of HelpNDoc: Free help authoring tool