See also ... Tutorials and Extended Functions
Basic Booking
The Sequence .. (New Booking) .... Bill ... Customer Pays .... Prints Receipt
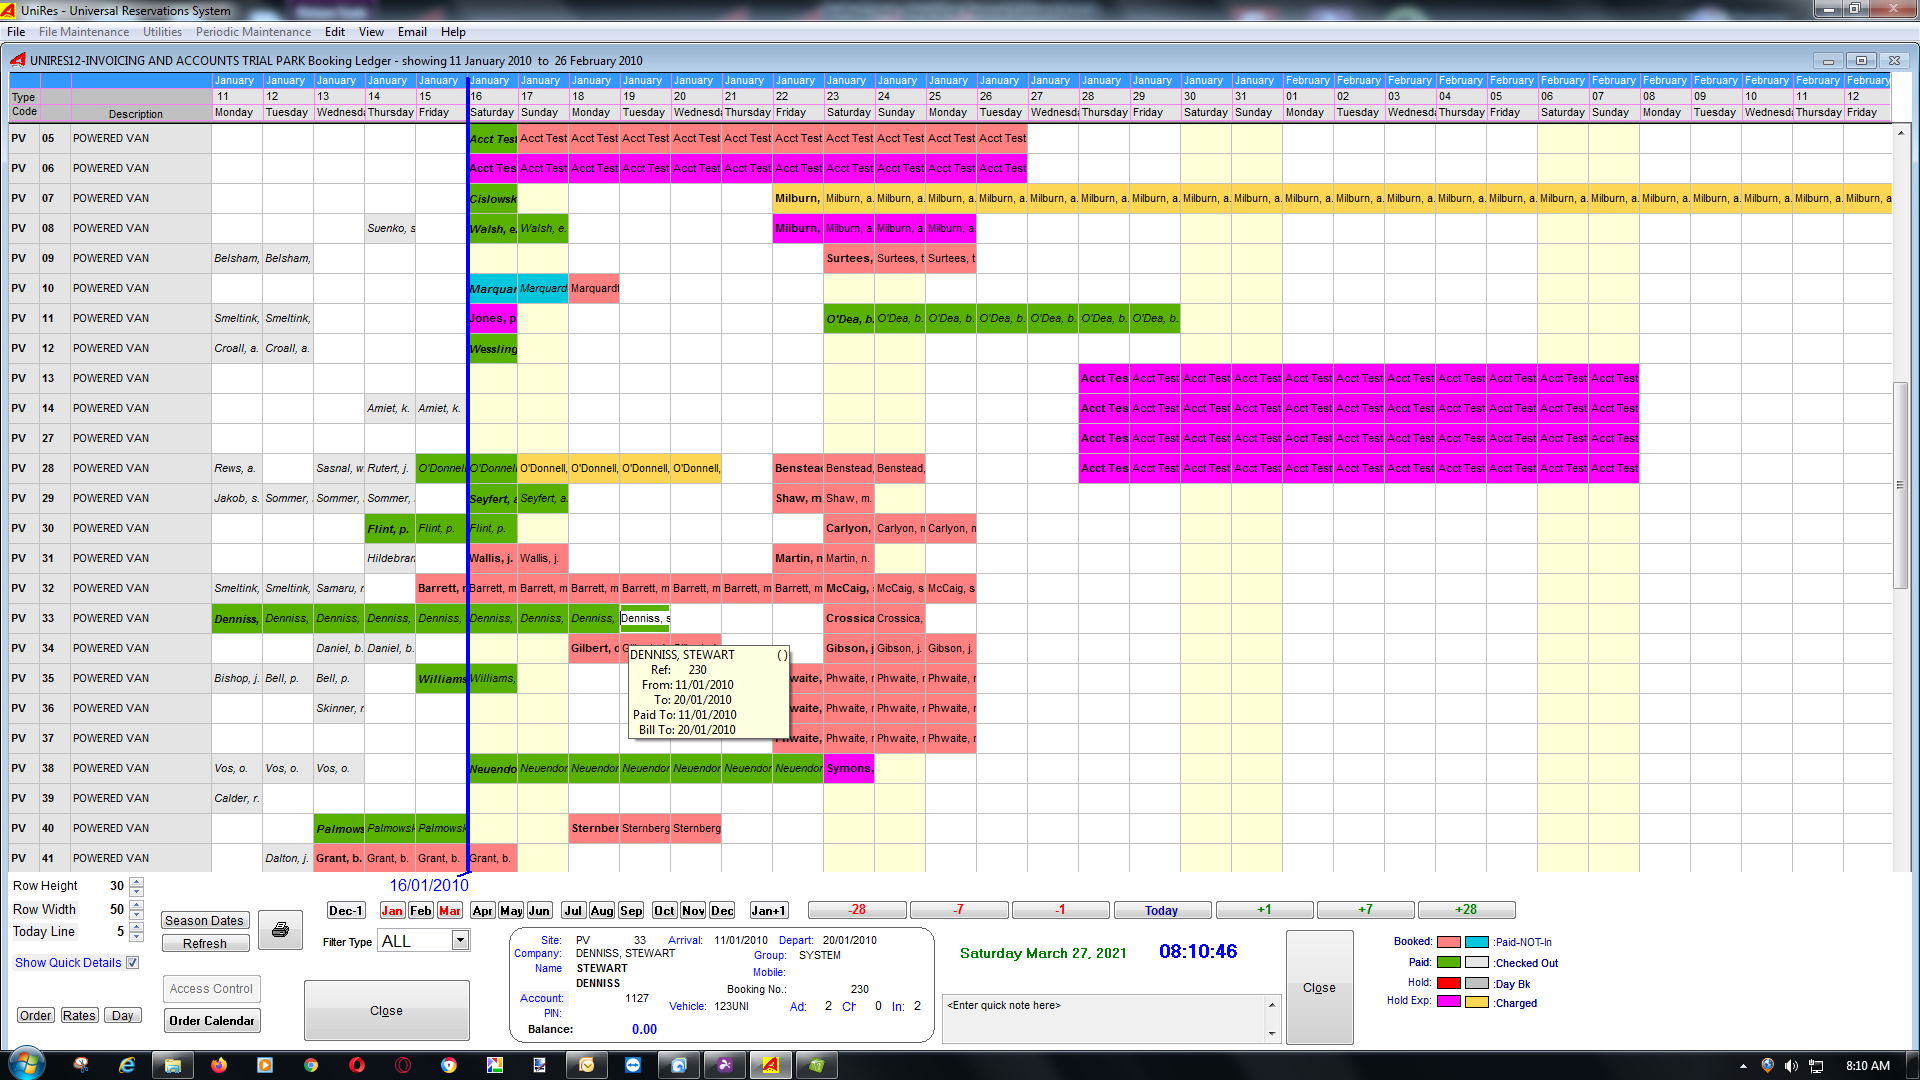
1.Pick a site from the Booking Ledger (Rack)................ The Book and Bill window is displayed
2.Enter the booking details ... Time, dates or Number of days, Name and address etc.
3.Book Button pressed.
4.Enter a charge, deposit, extra persons etc
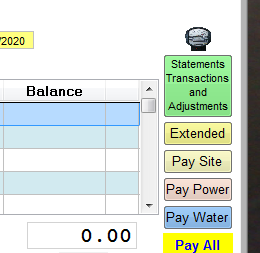
5.Press the letter A when the cursor is again ion the Code column of the charges grid. (or click on Pay All.)
6.Print a Receipt (or skip printing), or select Email to Email a receipt.
Continue on with the next client at the counter.
----------- Invoicing to an Account ? Click here
1.Pick a site from the Booking Ledger (Rack)................ Booking Ledger
2.
Continue on with the next client at the counter.
Select New Booking from the Command Centre.

or ..
Map
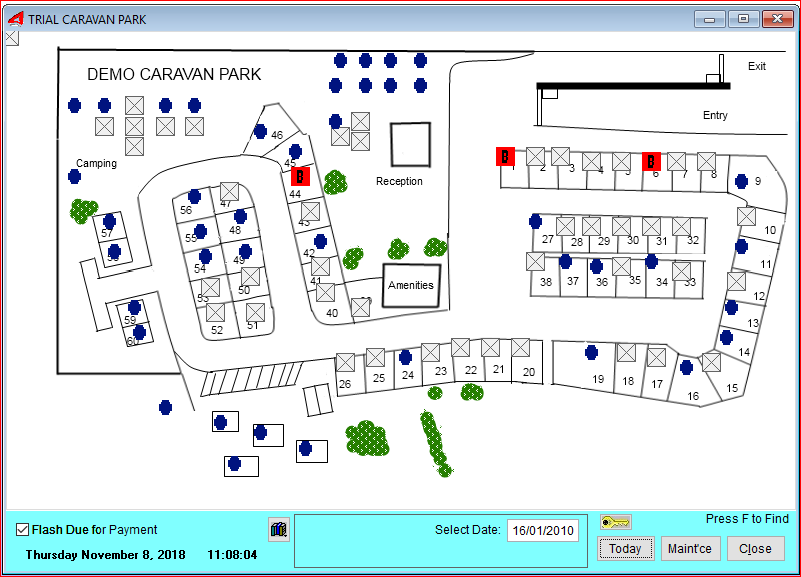
Double click on vacant site in the Booking Ledger or Map.
Enter the booking details ... Time, dates or Number of days, Name and address etc.
Start by entering ... or accepting the booking requested time and dates.
•Number of persons, Adults, children and Infants .
•If the site has been pre picked from the booking ledger or map, just press enter through, or pick and enter a site number.
•If the site number field is blank, press Enter to see a list of free sites ...
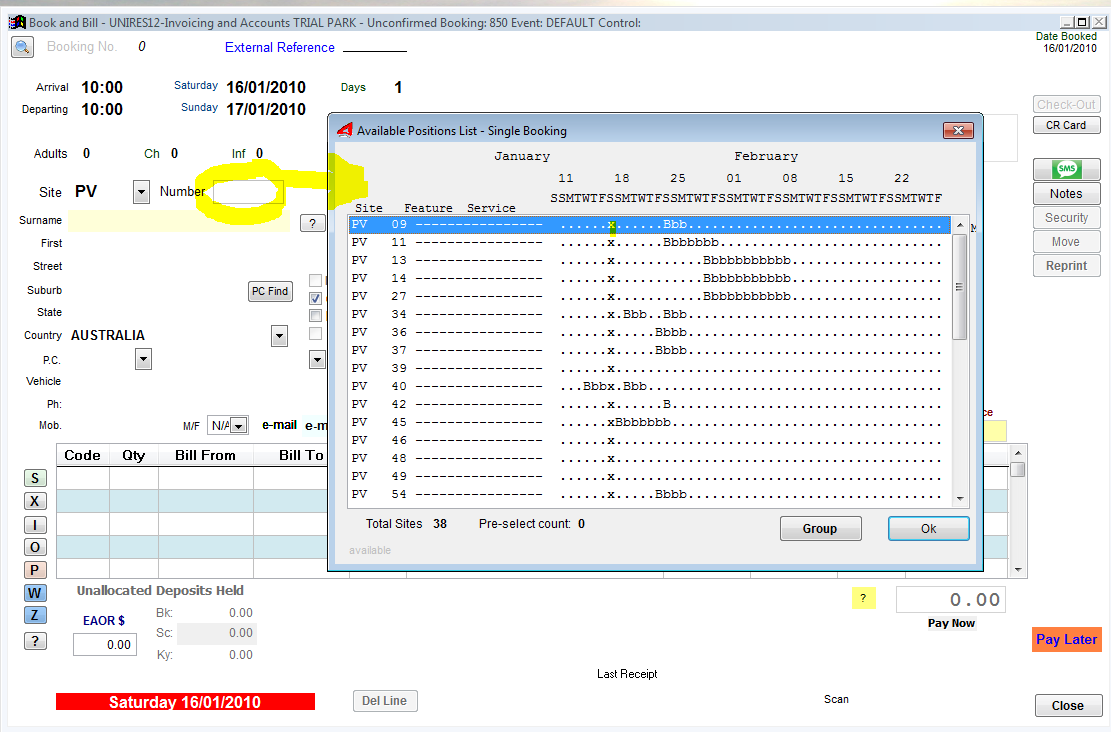
•In the popup list, the vertical list displays free vacant sites for the period.
•The x's denote the rewuested period in the calendar.
•The Bbbbbbbbb's display existing bookings, so you can determine which sites are best, if the clien may wish to extend their stay without having to move.
•Use the keyboard up/down keys to select a site and press Enter.
Book Button pressed.
•Enter a charge, deposit, extra persons etc
•Press the letter A when the cursor is again ion the Code column of the charges grid. (or click on Pay All.)
•Print a Receipt (or skip printing), or select Email to Email a receipt.
The following Bookings window is displayed.
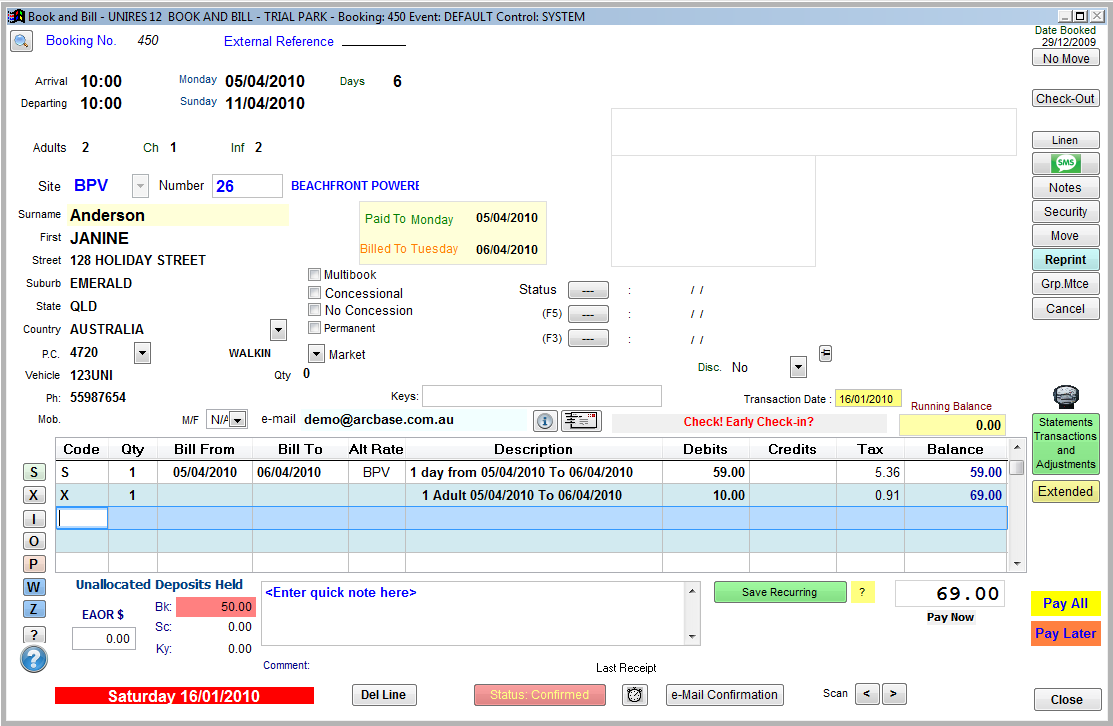
Entering Arrival and Departure Dates
or just enter Arrival date. Then the number of days ...
Book and Bill Invoicing System (Optional Upgrade)
Newer versions are available as Book and Bill versions (Open Order Billing) -.
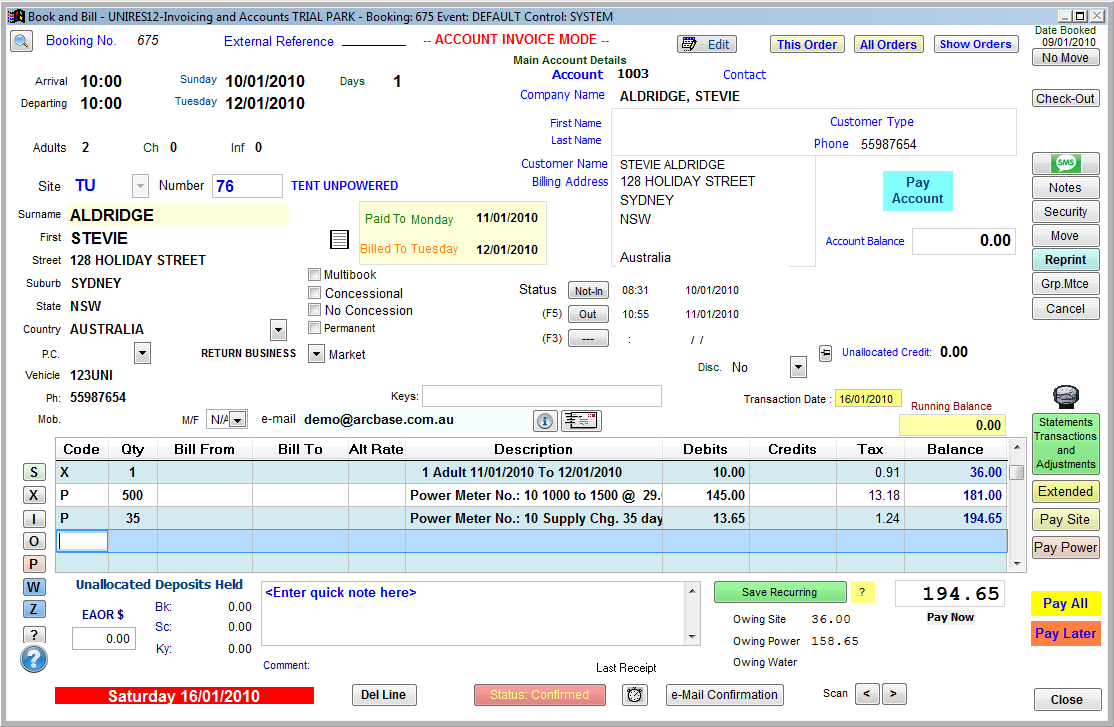
(UniRes 12 with Invoicing Option enabled shown above)
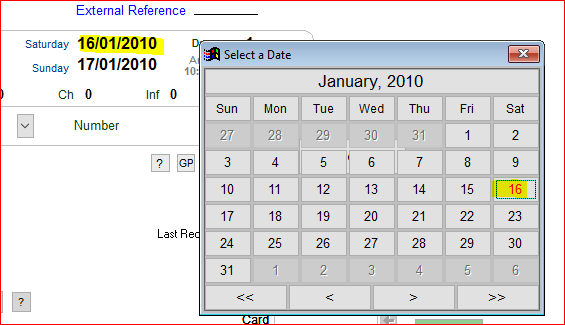
Tip: Right click on a Date field to select by calendar
If you selected a site from the Booking Ledger, the Arrival date is entered for you and the departure date is the arrival date plus 1 day by default.
Entering the number of days in the Days field, will set the Departure date for you if you skip the Departure date, the departure date is calculated for you by adding the Days to the Arrival Date.
Most date fields in UniRes have the right click calendar popup.
Enter information into the fields. Use the Enter Key to move between input fields.
Record the clients details into the fields, using the Enter Key to move between fields. (You can also use the TAB key).
Name Search (finding and using name/address from previous bookings)
If a client has been in before, you can serach the Booking files for past bookings by entering part or all of the surname, starting a name search using the F9 function key.
Navigating around the Screen
Enter data into the input fields and press the Enter key to move to the next input.
Some fields will auto-complete when the data is keyed in. That is, when the field is full, the next field is automatically selected.
On some fields you may need to use the mouse to select a field to change and then click on the last field you entered to return to the input sequence.
Select a Site to book
When you reach the Site field, press enter to see a list of site types you have set up...
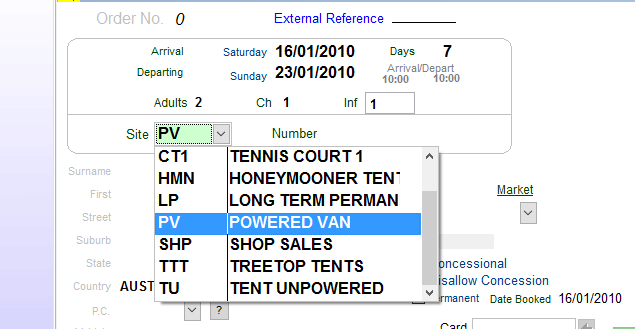
... use the keyboard up/down keys to select the site type and press enter.
Next, you can enter a free site number or leave the number field blank to have UniRes show you which sites for the Site Type are free.
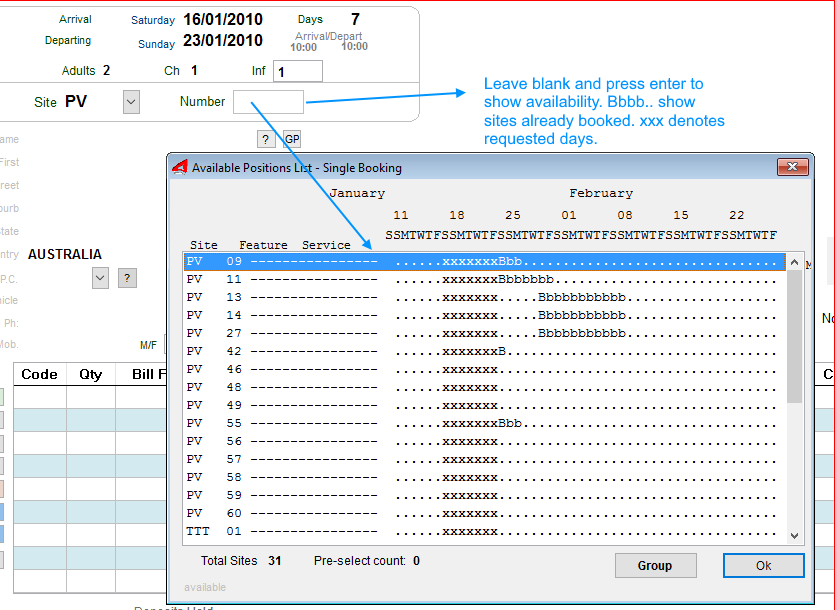
If you did not directly enter a number, pick a site from the Availability Positions List, again using the keyboard arrow keys and press enter.
Enter any key numbers now or just press Enter. Key number can be entered later.
When your input cursor travels past the Key Number field ...
Credit Card Details Entry (Option)
Credit card details can be recorded as part of the booking process. This optional step can be truned on or off using File maintenance - System Settings.
If the Credit Card Recording is turned on, the following pop-up is displayed.....
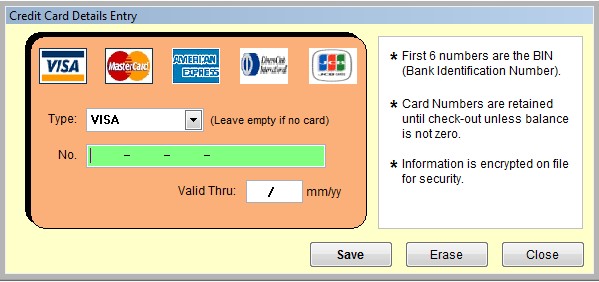
The cursor is placed in the "Type" field, ready for you to select the type of card.
Note
If no credit card recording is required , just press the Enter Key twice to skip to the next step or question.
Tip. After the booking is made, you can always see and adjust the Credit Card data in the Extended settings ..
This message is displayed .. Press Enter to book.
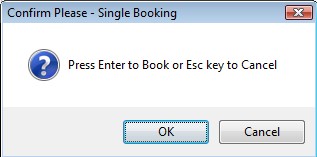
Press Enter, as the default answer (the button with the dots around it) if Ok.
The Booking has been made now and recorded in the computer.
Cancelling an Action
If you decide not to book the site now, press the Escape key on your keyboard. You can now either edit a field or leave the Booking altogether by pressing the Escape key again. Pressing Escape, cancels the action - no booking is made.
Tip: As a security precaution, Bookings are never deleted - you just check - out the booking using the charges program or Cancel using F3 to free up the site. This way you will always have a record of any " booking and "tampering" is prevented.
You can now decide to enter charges to the customer and produce a receipt. Because the OK button is highlighted all you need to do is press enter to go into charges mode.
If you want to make another booking instead, press your keyboard right-arrow key to highlight Cancel and press Enter (or just press the Escape key). The screen will clear and be ready to enter another single booking.
Note: The File Maintenance - Regular Cleanup moves the checked out bookings to history files under the computer managers direction, so old bookings may not be in history until a periodic maintenance is performed. Periodic maintenance should be performed at least weekly.
See also ... How To's - Frequently asked questions
... Tutorials and Extended Functions
Note that the invoicing system does require knowledge about debtors account systems and practices.
UniRes Book and Bill may be all you need and can be a better option for you.
When making a New Booking the ? Button and GP Button are visible to the right of the Surname field.
These options are not available after a booking is made and the Payment Grid becomes active.
Also note that if the Invoicing Option is installed,you can select between two booking types..
namely,,,
Account Type ... Add a Basic Booking or Create a New Client Account.
The default is Add a Basic Booking. Most of the time, you may not need to create a master account for every booking or walk-in. Hence the option.
Also if a booking is a Basic Booking (and Invoicing is optioned), Basic Bookings can be easily converted to an account booking.
Group Booking GP button.
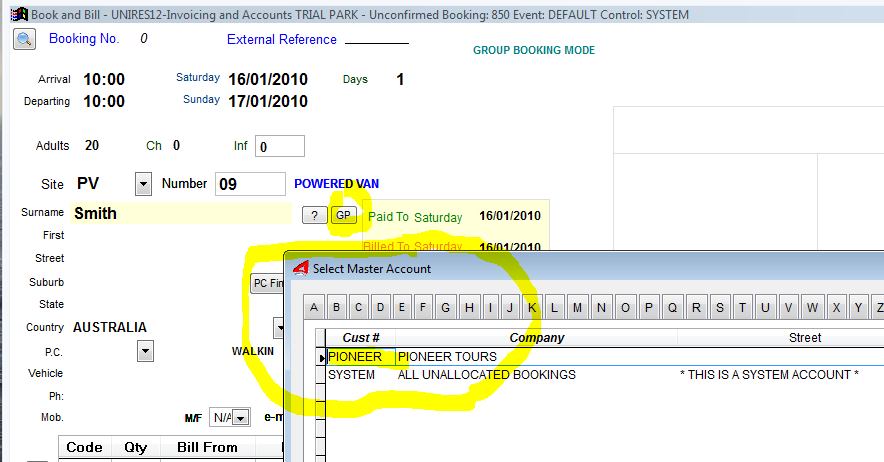
If you enter a surname and click on the GP button, you will see the Select Master Account window.
Select the predefined Group Master Record which the group member booking will belong to.
The booking will then inherit the properties of the group and permissions, charge rates and rules.
See Topic on Group Bookings.
Invoicing Debtors Structure with Customer Master Accounts are Optional. See our Pricing Structure for details.
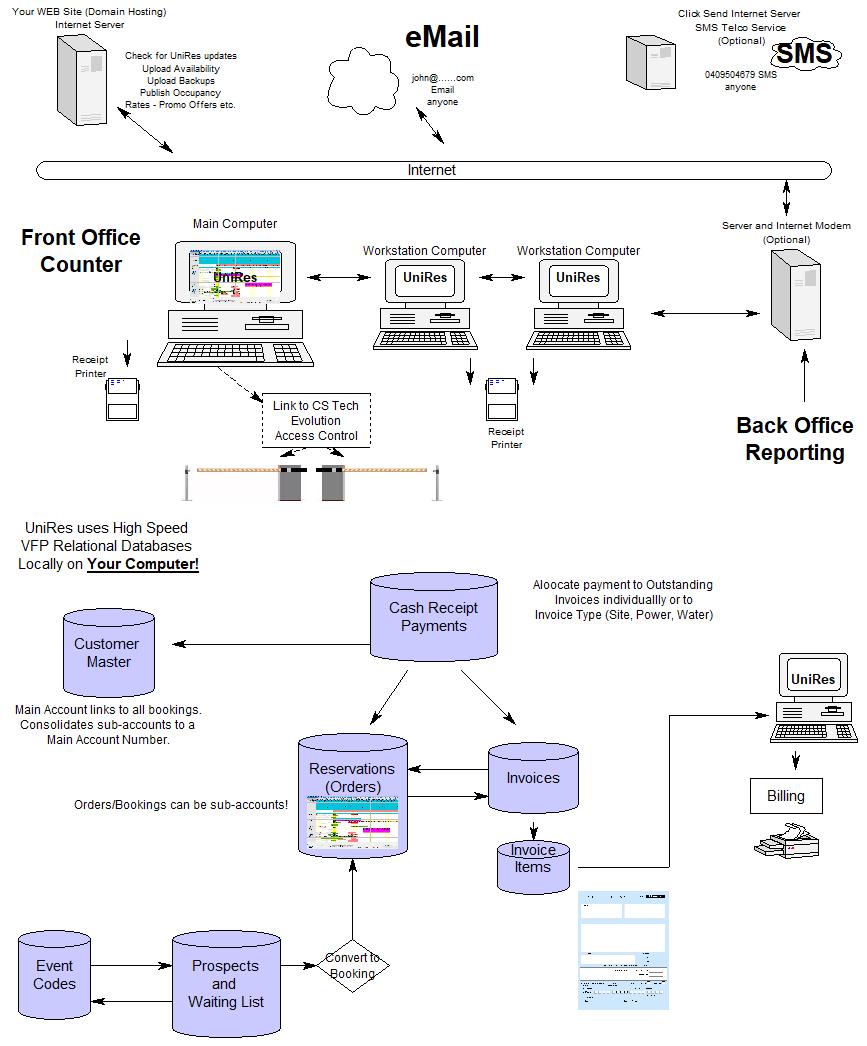
Redesigned UniRes Book and Bill with Invoicing - Easy Debtors Invoicing System
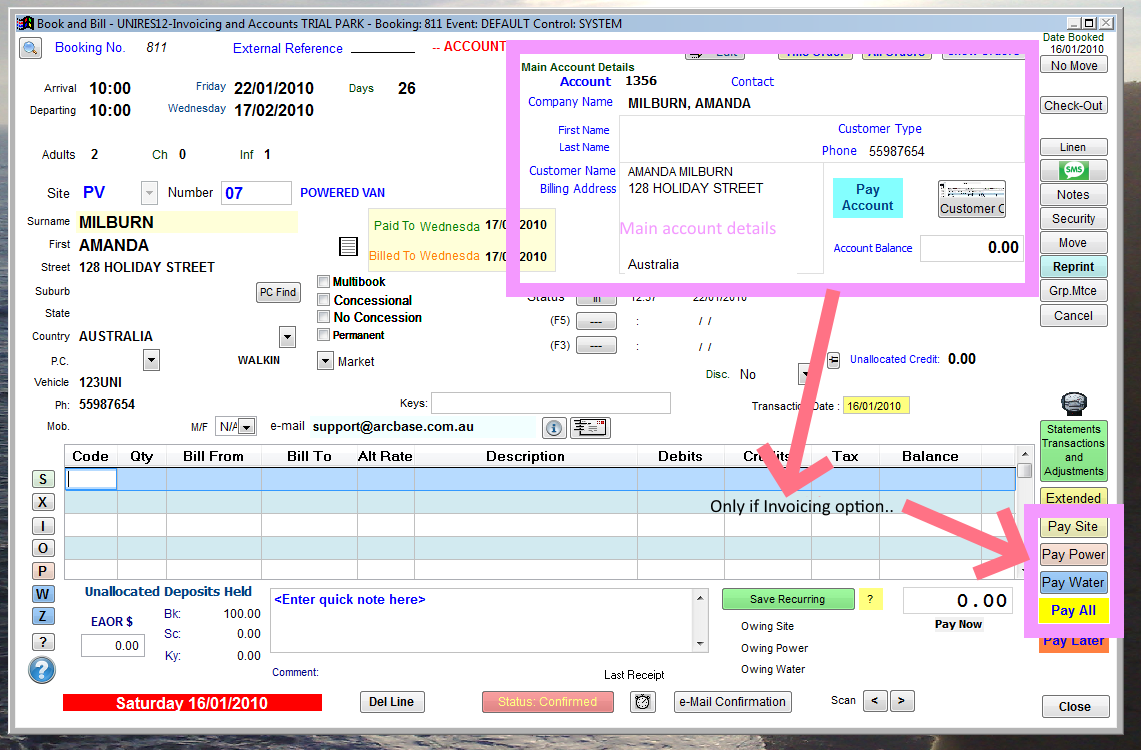
UniRes 11 Invoicing - Preview.
Changes are have been made to incorporate Invoicing, improving the work flow at the front counter. Less work and faster booking.
1. The Fields in green are the same as the previous UniRes versions, except that they are preceeded by the ....
•Account Number
•Arrival and Departure date requested
•Adults, Children , Infants, Pets (If applicable)
•Site Type and Number
•then...
• and the Booking Name , Address etc..
The change in the input order make it much easier for the Booking Front Counter, Telephone Inquiry etc
Account Number Generation
All new bookings are allocated a New Sequential Customer Account Number (or if an account exists, the original account number is allocates. If No account is allocated or wanted, the booking is allocated to the Cash Account. Someone who has a previous Cash Account can be converted to Account and allocated an number.
The Invoicing System works within the Original UniRes Book and Bill framework. The user has only to enter charges as usual - save them and take a payment as before,
So whats the difference to the old UniRes? Well saving a charge for site fees and site fee related extra charges (sales) can be stored for later payment as an Invoice. A new invoice number is generated for site fee charges. Every group of charges genrates an invoice when saved or paid saved and paid. Transparently to the operator. UniRes detects is Power or Water related charges are posted as an invoice.
Payment Type preselection
You can then accept payment to invoices separately either by selecting from the on-screen payment option buttons (Pay Power, Pay Water, Pay Site Fees or Pay All) Selecting a payment type leads to to the usual payment screen (Final Charages)..
Manual ALLOCATION of payment.
There is also a Payment Allocation window which displays all outstanding Invoices for the client main account, allowing you to selectively disperse payments to selected Outstanding invoices.
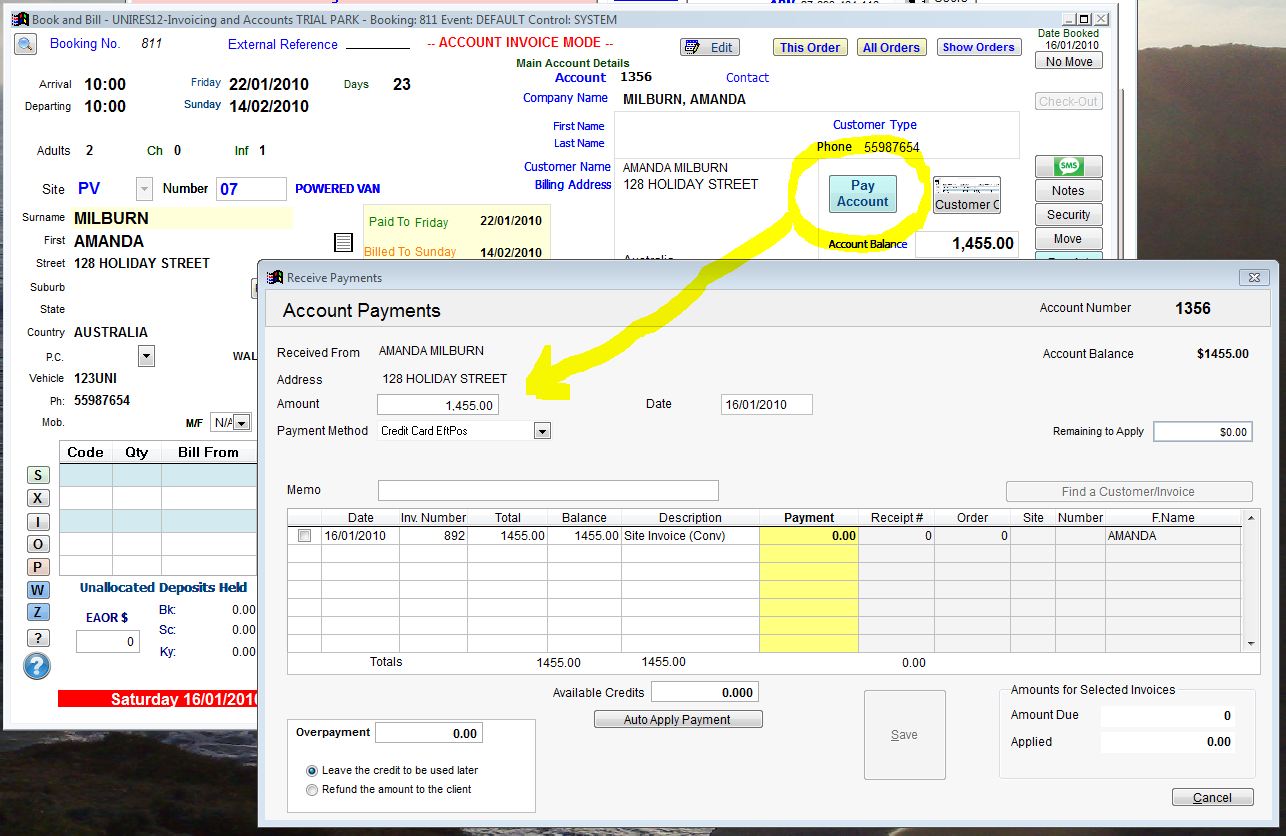
As there can be multiple current Bookings (Orders) to an account, each booking may have several invoices outstanding.
If the account is paid and the payment is for several booking invoices, use the Account Payment window to apply the payments to the respective invoices.
The example above only shows one invoice. You can Auto Apply the payment, or selectively pay the invoices. UniRes maintains a Disbursement File so the payment can be tracked.
Note that the Pay Account window is usually only used by the "Back Office".
Created with the Personal Edition of HelpNDoc: Free EPub and documentation generator