or equivalent.

Note: The receipt printer is an Commercial Printer, so windows will not have a driver for it.
Software: Receipt printers require a special driver program to interface the device to the PC. Your printers web site support page should allow you to download and install the correct driver for your model receipt printer.
Purchase a 40 column Thermal printer with a USB port.
Note:Be sure to NOT plug your Receipt Printer USB cable into the PC before you have installed the printer driver software. If you have, you may have to uninstall the driver loaded by Windows and reinstall the custom device driver for the printer.
(Refer to the Printer Installation guide for details)
UniRes has a special form for the 40 column receipt printer.
See: New Printer - How to tell UniRes ... and selecting a TM - xx type printer form.
After installing ..
PRINTING A TEST PAGE FROM WINDOWS
You can print a test page now from Windows, to see if the printer is setup correctly.
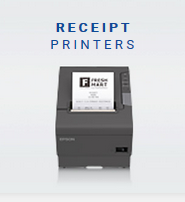
Turn the Epson TM-xxx on. Check the cables and plugged in and you have installed the printer paper. If the Printers Error light is on, press the printers FEED button.
Select Start - Settings - Printers & Faxes (or just Printers) - Right click again on the printer you installed and select Properties.
Click on the button called "Print Test Page".
PRINTING A TEST RECEIPT FROM UNIRES
If the Windows printer test page printed ok, you can now print a test receipt from UniRes.
Start UniRes (or Maximise UniRes if it is already running).
From the Command Centre - click on the Charges button.
Select a booking from the list who has a checked-in status of "Yes". We are goint to Reprint a Receipt, so we need a booking that has been previously receipted.
Now you should have a Booking up on the screen with the Booking Details displayed and the Charge Lines showing. Your cursor should be in the Code column of the charge line area.
Press R to start the Reprint window.
Select a receipt number to reprint first.
Be sure a tick in in the "Use Generic Receipt Form" tick box.
Click on Print. (Note that the Preview Button will always preview in the A4 non-generic form mode.)
If you successfully installed the printer, a receipt should start printing and the paper should stop at the bottom of the receipt with the last line of the receipt visible (teat off model) or your should hear the paper cut mechanism cut the paper (Paper Cut Model).
TEAR OFF MODEL
Hold boh copies of the receipt and tear off across the cerated edge in one smooth action.
PAPER CUT MODEL
The paper is a "Partial Cut" which leaves a tiny uncut piece in the centre of the receipt. Just pull the paper up and the receipt will pull away. The uncut piece is intentional and stops the receipt from falling behidn the printer or on the floor.
THERMAL PRINTING
You should be using Thermal paper rolls. Print two copies if you want handing one to the customer. If you have a customized receipt form requiring a customer to sign, keep the original and hand the copy to the client.
PRINTER RIBBON
The ribbon cartridge is a continuous ribbon type and keeps looping around. Eventually the printing will become too feint to read. Replace the ribbon in this case. The carbon copy will always be the same clarity.
The standard printer ribbon is black and red. You only use the blackpart however. When purchasing replacement ribbons - you can order all black ribbons as a replacement. Keep new or unused ribbons in a sealed plactic bag so that the ribbon does not dry out. Use the manufacturers ribbon as a replacement for best results.
PAPER END SENSOR
The printer will sense when the paper runs out. Before the paper runs out, you will see red lines appear on the roll paper. Replace the roll when this happens. (See inside the printer lid on how to reinstall the roll paper.)
PAPER ROLLS
The paper rolls are 78 mm wide and can be purchase from your local stationers. Keep enough rolls in stock to meet your requirements. Keep the paper in a plastic bag in a dry cupboard.
PRINTER SELF TEST
The printer has a built-in self test feature. To activate the elf test, be sure there is a ribbon in the printer and roll paper inserted ready to print.
1. Turn printer off.
2. Hold down the Feed button on the front of the printer and while holding the feed button down, turn the printer on. Release the feed button after a few seconds. The printer will start printing. At the end of the first test page, the printer will ask (by typing on the paper) if you want to carry on printing a character test. Press the feed button again to continue the test or turn off the printer.
The self test confirms that the printer is working, but does not confirm that the printer is "talking" to the computer or that you are connected and ready to print from the Windows operating system.
Note: Only fully paid up sales items print on a receipt. Partially paid items will appear on the next receipt when full payment received.
If the client wants an itemised account, Print a Statement.
Created with the Personal Edition of HelpNDoc: Free Kindle producer